%20--%3e%3cdefs%3e%3cstyle%3e%20.st0%20{%20fill:%20%23222;%20}%20%3c/style%3e%3c/defs%3e%3cpath%20class='st0'%20d='M27.17,1.45c.76,0,1.38.62,1.38,1.38v24.33c0,.76-.62,1.38-1.38,1.38H2.83c-.76,0-1.38-.62-1.38-1.38V2.83c0-.76.62-1.38,1.38-1.38h24.33M27.17,0H2.83C1.27,0,0,1.27,0,2.83v24.33C0,28.73,1.27,30,2.83,30h24.33c1.57,0,2.83-1.27,2.83-2.83V2.83C30,1.27,28.73,0,27.17,0h0Z'/%3e%3cg%3e%3cpath%20class='st0'%20d='M23.45,15.98h-12.04c-.42,1.49-1.8,2.42-3.29,2.25s-2.66-1.45-2.68-2.97,1.1-2.82,2.61-3.03,2.93.72,3.35,2.23h2.72s0-2.72,0-2.72c-1.49-.42-2.41-1.8-2.24-3.29s1.45-2.66,2.97-2.67,2.82,1.1,3.03,2.61-.72,2.93-2.23,3.36v2.73s7.77,0,7.77,0c.44,0,.77.32.78.73.01.37-.25.78-.76.78ZM15.75,7.56c-.76-.52-1.71-.25-2.14.44s-.24,1.59.43,2.05,1.64.3,2.11-.39.35-1.6-.39-2.1ZM9.33,13.98c-.76-.52-1.71-.25-2.15.44s-.24,1.59.43,2.05,1.63.31,2.11-.39c.44-.65.34-1.61-.39-2.1Z'/%3e%3cpath%20class='st0'%20d='M15.65,23.73c0,.48-.32.79-.73.81s-.79-.31-.79-.78v-5.51c0-.44.33-.76.72-.78.42-.02.79.31.79.78v5.48Z'/%3e%3c/g%3e%3cg%3e%3cpath%20class='st0'%20d='M38.89,10.38h9.91v2.41h-9.91v-2.41ZM43.79,23.96c-.63-.3-1.09-.75-1.4-1.36-.31-.61-.46-1.38-.46-2.32V5.88h2.67v14.43c0,.56.14.98.42,1.26.28.28.7.42,1.26.42h2.53v2.41h-2.67c-.94,0-1.72-.15-2.34-.45Z'/%3e%3cpath%20class='st0'%20d='M52.32,23.92c-1.04-.63-1.85-1.51-2.43-2.64-.58-1.13-.87-2.42-.87-3.86s.29-2.76.87-3.89,1.39-2.02,2.43-2.65c1.04-.64,2.22-.95,3.55-.95s2.48.32,3.52.95c1.04.64,1.85,1.53,2.44,2.67.59,1.14.88,2.43.88,3.87s-.29,2.75-.87,3.87c-.58,1.12-1.39,2-2.43,2.62-1.04.63-2.22.94-3.55.94s-2.51-.31-3.55-.94ZM58.05,21.83c.63-.41,1.11-1,1.45-1.75.34-.76.51-1.64.51-2.65s-.17-1.89-.52-2.65c-.35-.76-.83-1.35-1.45-1.78-.62-.43-1.33-.65-2.13-.65s-1.54.22-2.16.65c-.62.43-1.1,1.03-1.45,1.78-.35.76-.52,1.64-.52,2.65s.17,1.87.51,2.64c.34.77.82,1.36,1.45,1.77.63.41,1.35.62,2.18.62s1.52-.21,2.15-.62Z'/%3e%3cpath%20class='st0'%20d='M66.69,23.92c-1.04-.63-1.85-1.51-2.43-2.64-.58-1.13-.87-2.42-.87-3.86s.29-2.76.87-3.89,1.39-2.02,2.43-2.65c1.04-.64,2.22-.95,3.55-.95s2.48.32,3.52.95c1.04.64,1.85,1.53,2.44,2.67.59,1.14.88,2.43.88,3.87s-.29,2.75-.87,3.87c-.58,1.12-1.39,2-2.43,2.62-1.04.63-2.22.94-3.55.94s-2.51-.31-3.55-.94ZM72.42,21.83c.63-.41,1.11-1,1.45-1.75.34-.76.51-1.64.51-2.65s-.17-1.89-.52-2.65c-.35-.76-.83-1.35-1.45-1.78-.62-.43-1.33-.65-2.13-.65s-1.54.22-2.16.65c-.62.43-1.1,1.03-1.45,1.78-.35.76-.52,1.64-.52,2.65s.17,1.87.5,2.64c.34.77.82,1.36,1.45,1.77.63.41,1.35.62,2.18.62s1.52-.21,2.15-.62Z'/%3e%3cpath%20class='st0'%20d='M77.99,4.48h2.67v19.93h-2.67V4.48Z'/%3e%3cpath%20class='st0'%20d='M82.84,10.38h10.47l-.53,2.81h-10.47l.53-2.81ZM85.47,23.85c-.63-.37-1.07-.88-1.33-1.53-.26-.65-.31-1.38-.14-2.2l2.75-14.26h3.23l-2.72,14.06c-.09.49-.01.89.24,1.21.25.32.62.48,1.11.48h2.53l-.53,2.81h-2.86c-.88,0-1.63-.19-2.26-.56Z'/%3e%3cpath%20class='st0'%20d='M94.77,10.38h3.23l-.98,5.02-.76,1.85c.28-1.48.65-2.73,1.09-3.76.45-1.03.97-1.81,1.56-2.33.59-.52,1.24-.79,1.95-.79h2.83l-.53,2.81h-2.3c-.8,0-1.5.18-2.08.53s-1.06.91-1.43,1.67c-.38.76-.68,1.75-.93,2.99l-1.15,6.03h-3.23l2.72-14.03Z'/%3e%3cpath%20class='st0'%20d='M105.18,10.38h3.23l-2.72,14.03h-3.23l2.72-14.03ZM105.91,5.01h3.87l-.62,3.31h-3.87l.62-3.31Z'/%3e%3cpath%20class='st0'%20d='M109.84,10.38h3.23l-2.72,14.03h-3.23l2.72-14.03ZM117.42,13.6c-.37-.58-.96-.87-1.77-.87-.95,0-1.78.42-2.47,1.25-.69.83-1.2,2.03-1.52,3.61l-.22-1.82c.21-1.18.57-2.21,1.09-3.09.52-.88,1.19-1.56,1.99-2.03.8-.48,1.67-.72,2.61-.72s1.73.24,2.39.72c.65.48,1.11,1.15,1.38,2.02s.29,1.86.08,2.96l-1.71,8.79h-3.23l1.66-8.48c.19-.97.09-1.75-.28-2.33ZM126.35,13.6c-.37-.58-.96-.87-1.77-.87-.95,0-1.78.42-2.47,1.25s-1.2,2.03-1.52,3.61l-.7-1.82c.19-1.14.57-2.15,1.15-3.03s1.3-1.57,2.16-2.06c.86-.5,1.78-.74,2.75-.74s1.8.24,2.47.72c.67.48,1.14,1.15,1.4,2.02.26.87.29,1.86.08,2.96l-1.71,8.79h-3.23l1.66-8.48c.19-.97.09-1.75-.28-2.33Z'/%3e%3c/g%3e%3c/svg%3e)
On this page8 sections
To create a product video without editing experience, start with one demonstration: what the product does, the evidence to show and the next action. A template can organise footage, but it cannot decide your message. Try FlexClip for a browser-based workflow; consider Movavi if you prefer editing files on your computer.
Make one publishable version first
Aim for a short video you can actually publish, not a complete brand film. This example fits an everyday physical product. Timings are editorial starting points, not platform requirements.
| Sequence | What viewers see | Useful copy |
|---|---|---|
| Opening, around 3 seconds | The product in context | The need it addresses |
| Demonstration, around 10 seconds | A real action and a detail | One feature, without an unverifiable superlative |
| Closing, around 5 seconds | The product and where to find it | View dimensions, explore colours or request a quote |
For a service, use an authorised demonstration or an anonymised example. Do not reveal client data. If you only have a photo, use simple crops and text rather than generating a fake demonstration.
Prepare assets before opening the editor
Gather three to five consistent shots or photos, a logo, one benefit statement and a call to action. Choose the publishing destination first, then its required format. Cropping vertical footage into a horizontal frame may cut off the product.
Keep original files and evidence of media rights together. Music found online is not automatically cleared for advertising. Check each asset’s terms, your plan and the intended destination. Library access is not a universal licence.
FlexClip or Movavi: where to start?
Try FlexClip for a template-based browser workflow. Its product-video page describes starting from visuals or a URL. Assess whether you can replace template elements while retaining control of the message. Check imported information before publishing.
Create a first version with FlexClip
Try Movavi to organise your own footage on a computer. Its Windows/Mac editor includes cutting, rearranging clips, titles and audio controls. Start without extra effects so you can distinguish the software licence from separately licensed assets.
Already working in Canva? Read FlexClip vs Canva before adding another editor. The FlexClip listing covers the documented plans and limits.
Build a first cut in five steps
- Import only the assets needed for your demonstration.
- Arrange the shots as problem, use, result and action.
- Trim pauses and remove distracting transitions.
- Keep text short and readable on a phone. Correct automatic captions.
- Export a short test before finishing the whole video.
Watch the test without sound. The product and next action should remain clear. Then listen through headphones: music should not overwhelm speech. Ask someone familiar with the product to check figures, dimensions, prices and claims.
Check the cost before finishing
A free download does not necessarily include watermark-free publishing. Movavi’s support page explains that trial exports carry a watermark and some effects require a separate subscription even when the software is activated.
For FlexClip, check resolution, stock assets and AI credits in your selected plan. Do not confuse an annual plan’s monthly equivalent with a monthly subscription you can cancel after one payment. This guide does not guarantee promotional prices.
Pay only after checking a representative export. If a template includes several paid assets, replace them with your own before deciding that you need a higher plan.
Before publishing
- The product matches what the customer will receive.
- Text is readable at the final display size.
- No unwanted watermark remains.
- Assets and music are licensed for the intended use.
- The final link opens the correct product with a coherent call to action.
- The project file and original media are saved.
Then measure visits and actions without attributing every change to the editor. This guide proposes a production workflow, not a comparative conversion test.
Frequently asked questions
Can I start with photos only?
Yes. Use crops and text to represent the product accurately. Do not present a generated animation as real evidence of how it works.
Must I pay before editing?
Start with a test export. Check watermarks, resolution and paid assets. Software and effects can have different licensing terms.
Sources and scope
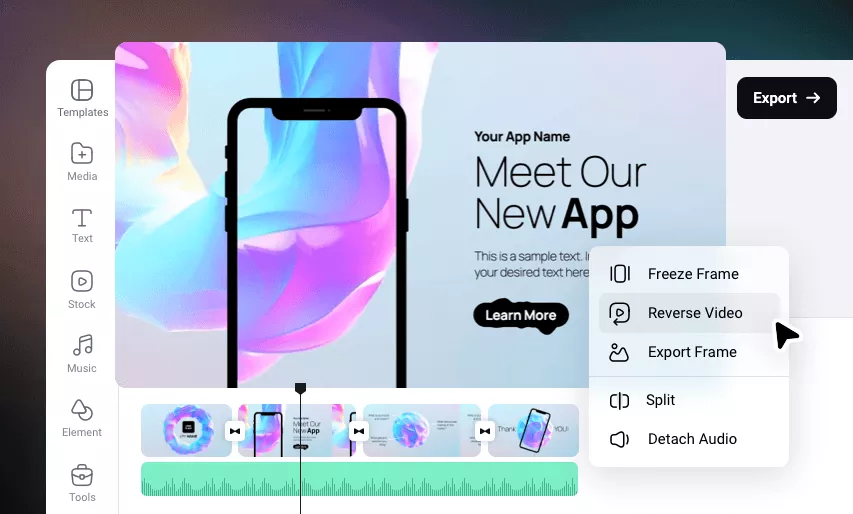
Official sources consulted on 27 September 2026: FlexClip Product Video Maker and Pricing; Movavi Vlog-Editing Software and “Why is there a watermark on my video?”. The publisher buttons above use the partner links supplied to ToolTrim. Visual: official FlexClip illustration, not a screenshot of a ToolTrim test.